
In This Article
Somewhere between the fortieth “I’m bored” of summer break and the fortieth tablet-time argument, a lot of Canadian parents start eyeing an arduino starter kit kids can actually grow into — not another toy that gets three days of attention before it’s buried under the couch cushions. Fair warning, though: not every kit sold as beginner-friendly actually is. Some ship with instructions written for engineers, not eight-year-olds, and a few “kid” kits are really just adult electronics kits with a cartoon sticker slapped on the box.

This guide skips the marketing fluff. We researched seven real, currently available kits — from a bare-bones C$55 board-and-breadboard set to a Wi-Fi-enabled premium option — and broke down what each one actually teaches, who it suits, and where the aggregated customer sentiment lands. An arduino starter kit kids use typically bundles a microcontroller board (the “brain”), a breadboard for wiring, and a batch of sensors, LEDs, and motors, paired with a project book or app that walks a child through building small circuits step by step. Think of it as Lego, but the finished model can blink, beep, and occasionally chase a ball across the kitchen floor.
We’ll also dig into build-your-own-robot projects, the difference between a plain electronics kit and a full coding robot kit, and where “AI-powered” robot kits for tweens genuinely deliver versus where the label is doing more work than the hardware. Canada’s Health Canada oversees toy safety standards for electronics sold here, so we’ve folded in what that actually means for parents shopping this category. Let’s get into the picks.
What Is an Arduino Starter Kit Kids?
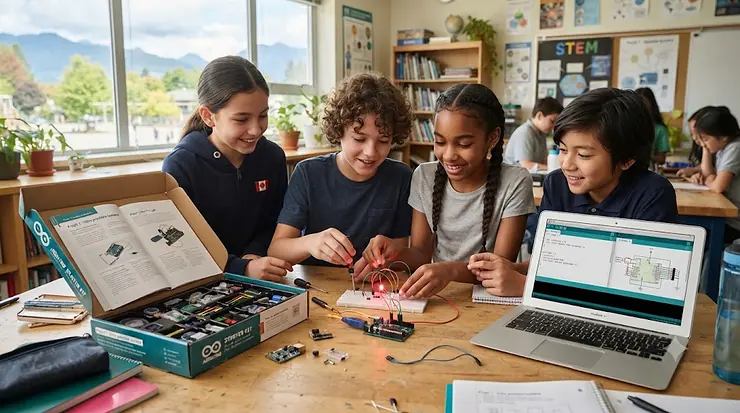
An arduino starter kit kids product is a beginner electronics bundle built around an Arduino-compatible microcontroller board, plus wiring, sensors, and a guided project book that teaches basic coding and circuit-building through hands-on projects like blinking LEDs, spinning motors, and simple sensor readouts — usually aimed at ages 8 and up.
Quick Comparison Table
| Product | Best For | Price Range (CAD) | Skill Level |
|---|---|---|---|
| Official Arduino Starter Kit | Authentic first kit, long-term use | C$70–C$90 | Beginner–Intermediate |
| ELEGOO UNO R3 Super Starter Kit | Budget-friendly entry point | C$55–C$65 | Beginner |
| Seeed Studio Grove Beginner Kit | Youngest beginners, no soldering | C$60–C$75 | Beginner |
| SunFounder 3-in-1 Super Starter Kit | Versatility (IoT + robot car) | C$75–C$95 | Beginner–Intermediate |
| ELEGOO Smart Robot Car Kit V4.0 | Build-your-own-robot projects | C$70–C$90 | Intermediate |
| SunFounder Elite Explorer Kit | Premium Wi-Fi/IoT learning | C$110–C$140 | Intermediate–Advanced |
| ACEBOTT Smart Robot Car Kit | Coding robot kit for tweens | C$55–C$75 | Beginner–Intermediate |
Looking at the spread above, there’s a genuine budget-to-premium ladder here rather than seven versions of the same box. The Official Arduino Starter Kit and ELEGOO UNO R3 Super Starter Kit sit at the entry level for kids who’ve never touched a breadboard, while the SunFounder Elite Explorer Kit is really a “kit that grows with them” purchase — it’s overkill for a first weekend but has enough headroom (Wi-Fi, IoT features) that a curious 13-year-old won’t outgrow it in a month. If your household is specifically chasing the build-your-own-robot itch, skip straight to the ELEGOO Smart Robot Car Kit V4.0 or ACEBOTT Smart Robot Car Kit rather than starting with a pure electronics kit.
💬 Just one click — help other Canadian parents make better buying decisions too! 😊
Top 7 Arduino Starter Kit Kids: Expert Analysis
1. Official Arduino Starter Kit — authentic board from Arduino’s own team
There’s something to be said for buying the original rather than a clone, and the Official Arduino Starter Kit leans hard into that pitch. It ships with a genuine Arduino UNO R3 board, a full breadboard setup, and a project book that walks through roughly 15 progressively harder builds — from a simple LED “spaceship interface” to a digital hourglass.
Specs-wise, the kit includes over 100 components and an illustrated guidebook running well past a hundred pages. In practice, that thickness matters: instead of a flimsy pamphlet, kids get real explanations of why a resistor is needed before a LED, not just where to plug it in. Based on the spec comparison with cheaper clones, the genuine UNO board also means zero driver-compatibility headaches when installing the Arduino IDE on a Windows or Mac computer — a common early frustration with off-brand boards.
The kit is pitched at ages 8–16, though the density of the project book suggests kids closer to 10+ get the most out of it without heavy parent involvement. Reviewers consistently report that the component quality feels sturdier than budget alternatives, and that the project book’s pacing (simple to complex) keeps kids from getting stuck early and giving up. A recurring critique in aggregated feedback is that, compared to bundle-heavy competitors, this kit includes fewer sensors overall — it’s a foundations kit, not a “do everything” kit.
Pros:
- ✅ Genuine Arduino board — no IDE compatibility surprises
- ✅ Well-paced, professionally written 15-project guidebook
- ✅ Sturdy component quality reported across reviews
Cons:
- ❌ Fewer sensors than bundle-focused competitors
- ❌ Premium price for the component count included
At around C$70–C$90, the Official Arduino Starter Kit isn’t the cheapest way in, but for families who want the “real” board and a genuinely well-written curriculum, it’s a solid value — especially since the board itself is reusable in every future project your kid builds.

2. ELEGOO UNO R3 Super Starter Kit — budget-friendly champion with 24 lessons
If price is the deciding factor, the ELEGOO UNO R3 Super Starter Kit is the one most Canadian parents land on first, and it shows in the review volume — it’s consistently one of the best-selling Arduino-compatible kits on Amazon.ca. It bundles an ELEGOO UNO R3 board (Arduino-compatible, not an official board), a breadboard expansion module, an LCD1602 display, a power supply module, and a 9V battery pack, plus a free PDF tutorial covering more than 22 lessons.
What the spec sheet undersells is how complete this “economical” tier actually is: an ultrasonic sensor, a DHT11 temperature/humidity sensor, a stepper motor with driver board, a servo motor, and a 5V relay all show up in the box — components that on some competing kits get sold as separate add-ons. That’s a meaningful chunk of real sensor-based learning for a kit priced at the bottom of this list.
This kit suits kids around age 10 and up who are comfortable following written instructions somewhat independently, since the tutorial is a downloadable PDF rather than an in-app guide. Aggregated reviewer sentiment is strongly positive on value for money, with recurring praise for component variety at this price point. The most common complaint centres on the compact plastic parts organizer, which some reviewers say is fiddly to repack once opened.
Pros:
- ✅ Best component variety per dollar in this list
- ✅ Includes power supply and 9V battery, ready to go
- ✅ 24-lesson tutorial covers sensors through motors
Cons:
- ❌ PDF-only tutorial, no in-app guidance
- ❌ Parts organizer tray is awkward to repack
Priced around C$55–C$65, this is the pick for a “let’s see if this sticks” first purchase — low enough stakes if your kid loses interest after a week, comprehensive enough that they probably won’t.
3. Seeed Studio Grove Beginner Kit for Arduino — plug-and-play, zero soldering
Breadboards intimidate a lot of first-timers, adults included, and the Seeed Studio Grove Beginner Kit for Arduino sidesteps that entirely. It’s built around a single all-in-one board (a Seeeduino Lotus, based on the ATmega328p chip — the same core processor found in a standard Arduino UNO) with ten of the most common modules — LED, buzzer, OLED display, button, rotary potentiometer, light sensor, sound sensor, temperature and humidity sensor, air pressure sensor, and a 3-axis accelerometer — already mounted directly on the board.
What that means in practice: no jumper wires falling out mid-build, no accidentally bridging two pins that shouldn’t touch. Kids connect modules with simple Grove-style cables instead, and the board even ships pre-programmed so something happens the moment it’s powered on — instant gratification that pure breadboard kits can’t offer on day one. The kit includes 12 guided projects and a free online course.
This is, honestly, the kit we’d point a first-time 8- or 9-year-old toward, or any child who’s shown frustration with fiddly wiring in the past. On the flip side, because the modules are fixed to the board, kids eventually outgrow the “remix your own circuit” flexibility that a breadboard-based kit offers — it’s an excellent on-ramp, not a long-term workshop. Reviewers frequently mention this as the least frustrating first Arduino experience their child has had, while some experienced hobbyist parents note it’s “too easy” for a returning learner.
Pros:
- ✅ No breadboard or soldering required
- ✅ Pre-programmed — works the instant it’s powered on
- ✅ Compatible with 300+ additional Grove modules later
Cons:
- ❌ Fixed module layout limits custom circuit design
- ❌ Kids may outgrow it faster than breadboard kits
Expect to pay in the C$60–C$75 range. Given how often “the wiring frustrated my kid” comes up in review threads for other kits, that’s a fair trade for a genuinely smoother first two weeks.
4. SunFounder 3-in-1 Super Starter Kit — IoT, smart car, and basics in one box
The SunFounder 3-in-1 Super Starter Kit earns its name honestly: it’s built around an Arduino Uno R4 Minima board and covers basic electronics, Internet-of-Things projects, and a small robot car build across 192 components and roughly 87 guided projects. For a household with more than one kid, or one kid who burns through content fast, that breadth buys a lot of runway.
The Uno R4 Minima board is a genuine step up from the older R3 architecture found in most budget kits — more memory, a faster processor — which matters once projects start combining multiple sensors at once (say, a temperature reading that triggers both a display update and a motor). SunFounder pairs the kit with the Circuit Basics online course platform, so instruction is video-based rather than PDF-only, which tends to hold younger attention spans better.
Who should buy this one: families who want a single kit that can plausibly last two or three years, moving from “blink an LED” through basic Wi-Fi-connected sensor projects and into a small robot car build, without buying a second kit. Reviewers highlight the online video courses as a standout versus competitors’ static PDFs, while a recurring theme in feedback is that 87 projects is genuinely more content than most kids will complete, which some see as inflated marketing and others see as long-term value.
Pros:
- ✅ Newer Uno R4 Minima board, more capable than R3
- ✅ Video-based course platform, not just PDFs
- ✅ Covers electronics basics, IoT, and a robot car build
Cons:
- ❌ Project count may overwhelm younger beginners
- ❌ Mid-range price for a kit still aimed at age 8+
At roughly C$75–C$95, it’s positioned as the “buy once” option for a family serious about sticking with this hobby rather than testing the waters.
5. ELEGOO UNO R3 Smart Robot Car Kit V4.0 — best for build-your-own-robot projects
If your kid’s real goal was never blinking LEDs but an actual robot that drives around the living room, the ELEGOO UNO R3 Smart Robot Car Kit V4.0 is built specifically for that. It includes an Arduino-compatible UNO R3 board, a two-wheel-drive chassis, an ultrasonic distance sensor, a line-tracking module, and an infrared remote, with app control available for both Android and iOS.
Once assembled, the car can perform obstacle avoidance (using the ultrasonic sensor to detect and steer around objects), follow a taped line on the floor, and respond to phone-based remote commands — three genuinely distinct programming challenges wrapped in one physical build. On paper this means kids aren’t just wiring components; they’re writing (or adapting) logic that reads a sensor value and decides what the motors should do next, which is a meaningfully different skill from a static circuit project.
This suits kids around 8–12 for the assembly and basic driving functions, with the sensor-programming side stretching comfortably into the young-teen range. Assembly does take real time and a bit of patience — this is not a fifteen-minute build — so expect a weekend project rather than an after-school one. Aggregated reviews consistently praise the “it actually works out of the box” reliability once assembled correctly, with the most common frustration being first-time chassis assembly, which several reviewers say benefits from a parent’s help on the first pass.
Pros:
- ✅ Three distinct programmable behaviours (avoid, follow, remote)
- ✅ Reliable performance once correctly assembled
- ✅ App control adds a phone-based interaction layer
Cons:
- ❌ Chassis assembly is fiddly for first-timers
- ❌ Best as a weekend project, not a quick session
Priced around C$70–C$90, this is the clearest “build your own robot” pick on this list, and a natural second purchase after a kid has finished a foundational kit like #2 or #3.

6. SunFounder Elite Explorer Kit — premium Wi-Fi and IoT learning
At the top end sits the SunFounder Elite Explorer Kit, built around an original Arduino Uno R4 WiFi board — meaning built-in wireless connectivity rather than a bolt-on shield. It pairs that board with an ESP32-based Bluetooth/IoT module, an IIC LCD1602 display, and an OLED screen, alongside SunFounder’s usual online tutorial and video course library.
What the wireless-native board changes in practice: projects that would otherwise need a separate Wi-Fi shield (adding cost, complexity, and another point of failure for young builders) work directly out of the box. That opens genuinely modern project types — a temperature sensor that pushes readings to a phone app, or a light that toggles from across the house — territory most budget kits can’t reach without extra purchases.
This is squarely a kit for a tween or teen who’s already completed a beginner kit and wants to build something that feels closer to a real Internet-of-Things gadget than a classroom demo. It is overkill as a first purchase; the learning curve on wireless projects is steeper, and a total beginner is likely to find the jump jarring. Reviewers who bought it as a second or third kit report the smoothest experience, while those buying it as kid number one occasionally note it felt like “too much, too soon.”
Pros:
- ✅ Native Wi-Fi board — no extra shield required
- ✅ Dual-display setup (LCD + OLED) for varied projects
- ✅ Strong fit for kids ready to move past basics
Cons:
- ❌ Steep learning curve as a first-ever kit
- ❌ Highest price point in this roundup
At around C$110–C$140, this is a considered upgrade purchase rather than an impulse buy — budget for it once you’re confident the interest is sticking.
7. ACEBOTT Smart Robot Car Kit — coding robot kit built for tweens
Rounding out the list, the ACEBOTT Smart Robot Car Kit is Arduino-compatible and marketed specifically at the 8–12 and 12–16 age brackets, positioning it as one of the more tween-focused coding robot kit options among Arduino-based cars. It includes a chassis, motor drivers, an ultrasonic sensor for obstacle detection, and line-tracking hardware, aimed at teaching both assembly and the programming logic behind autonomous movement.
The practical draw here is accessibility: the assembly process and accompanying guide are pitched more explicitly at a younger audience than some competitors’ robot kits, with instructions written in plainer language. What most buyers overlook about this category of kit is that “smart” and “autonomous” don’t mean true artificial intelligence — the car is following if-this-then-that logic based on sensor thresholds, not learning or adapting on its own. That distinction matters when a tween asks “is this AI?” — the honest answer is “not exactly,” and that’s worth explaining rather than letting the marketing language do the talking.
This kit is a strong fit for a tween who wants a coding robot kit experience without the steeper assembly curve of some competitors, and who’s motivated more by “I built a robot” bragging rights than deep electronics theory. Reviewers report a genuinely approachable build process for the age range, with occasional notes that the bundled sensor set is narrower than dedicated electronics kits like #1 or #2 — reasonable, since building a functioning car (not a sensor library) is the point.
Pros:
- ✅ Explicitly designed and written for tween age brackets
- ✅ Straightforward obstacle-avoidance and line-tracking logic
- ✅ Approachable assembly relative to other robot car kits
Cons:
- ❌ Narrower sensor variety than pure electronics kits
- ❌ “Smart”/AI labelling oversells the actual logic involved
Expect a price around C$55–C$75, making it one of the more affordable ways into robot-building specifically, if your household is choosing between a robot kit and a general electronics kit.
Top 7 Products Comparison: Specs & Value
| Product | Board Type | Key Strength | Best For |
|---|---|---|---|
| Official Arduino Starter Kit | Genuine Arduino UNO R3 | Authenticity, guidebook quality | Committed first-time buyers |
| ELEGOO UNO R3 Super Starter Kit | Arduino-compatible UNO R3 | Component variety per dollar | Budget-conscious families |
| Seeed Studio Grove Beginner Kit | Seeeduino Lotus (ATmega328p) | No wiring, instant results | Youngest beginners (8–9) |
| SunFounder 3-in-1 Super Starter Kit | Arduino Uno R4 Minima | Breadth (electronics + IoT + car) | Multi-year, multi-kid households |
| ELEGOO Smart Robot Car Kit V4.0 | Arduino-compatible UNO R3 | Robot-building, sensor logic | Build-your-own-robot fans |
| SunFounder Elite Explorer Kit | Arduino Uno R4 WiFi | Native wireless connectivity | Tweens/teens past basics |
| ACEBOTT Smart Robot Car Kit | Arduino-compatible | Tween-friendly robot build | Coding robot kit newcomers |
The clearest pattern in this table is that board generation matters more than most parents expect: kits built on the newer Uno R4 architecture (the SunFounder 3-in-1 Super Starter Kit and SunFounder Elite Explorer Kit) simply support more advanced projects than R3-based kits without needing add-on shields. That said, board generation isn’t everything — the Seeed Studio Grove Beginner Kit uses an older-style chip but wins purely on ease of first use, which matters more than raw capability for a six-year-old’s attention span.
✨ Don’t Miss These Exclusive Deals!
🔍 Ready to Pick the Right Kit? Take your kid’s STEM journey to the next level with these carefully researched picks. Click any highlighted kit above to check current pricing and availability on Amazon.ca. These kits are built to spark genuine curiosity — and maybe a robot uprising in your living room. 🤖
Practical Usage Guide: The First 30 Days With an Arduino Starter Kit
Getting the box open is the easy part — the first month is where most kits either stick or get abandoned in a closet. A few practical steps make a real difference.
Setup: Before anything else, download and install the free Arduino IDE (the software used to write and upload code to the board) on the family computer. Do this the night before gifting or handing over the kit, not in front of an impatient eight-year-old — driver installation occasionally needs a restart, and that’s a momentum-killer.
First week: Stick to the guidebook’s first three or four projects even if your kid wants to skip ahead. Early projects (usually a blinking LED) exist to confirm the board, cables, and software are all talking to each other correctly — skipping them makes later troubleshooting much harder, since you won’t know which layer failed.
Maintenance: Loose jumper wires are the single most common point of failure. A quick weekly check that connections are still seated properly will save a lot of “it stopped working!” frustration. Store small components in a labelled container — the tiny organizer boxes that ship with budget kits are notoriously easy to spill.
Common first-month mistakes: Rushing past the theory explanations, forcing components into a breadboard backwards (most have a correct orientation), and — the big one — a parent taking over the keyboard the moment code doesn’t work on the first try. Debugging is the actual lesson; resist the urge to fix it for them.
Real-World Scenarios: Matching a Kit to Your Kid
The cautious first-timer (age 7–9): A kid who’s never handled electronics and gets easily discouraged does best with the Seeed Studio Grove Beginner Kit. No wiring mistakes to make, instant results on power-up, and a short 12-project arc that builds confidence without overwhelming detail.
The budget-conscious household with a curious 10-year-old: If you’re not sure the interest will last, the ELEGOO UNO R3 Super Starter Kit offers the most sensor variety for the lowest financial risk, with a 24-lesson tutorial that has real depth if the interest sticks.
The tween who wants bragging rights, not theory (age 11–13): For a kid motivated by “look what I built” rather than circuit diagrams, either the ACEBOTT Smart Robot Car Kit or ELEGOO Smart Robot Car Kit V4.0 delivers a tangible, driveable result — a coding robot kit outcome rather than an abstract electronics lesson.
The returning learner ready to level up (age 13+): A teen who’s already finished a beginner kit and wants Wi-Fi-connected, IoT-style projects is the target buyer for the SunFounder Elite Explorer Kit — its native wireless board unlocks project types the entry-level kits simply can’t attempt.

Build Your Own Robot: From Blinking LED to Rolling Robot
“Build your own robot” sounds like a single leap, but it’s really three smaller ones stacked together, and understanding that sequence helps set realistic expectations.
Problem: Kids expect a robot on day one. Most electronics kits start with static projects — LEDs, buzzers, simple sensors — before any motor shows up. Solution: frame the early weeks explicitly as “training” for the eventual robot build, and if a robot really is the end goal, consider starting directly with a dedicated build like the ELEGOO Smart Robot Car Kit V4.0 rather than a general electronics kit.
Problem: Assembly frustration derails momentum. Chassis assembly — attaching wheels, motors, and the sensor mounts — is genuinely fiddly for small hands and first-timers. Solution: treat the physical build as a separate session from the coding, ideally with a parent handling the trickier mechanical steps while the kid drives the screwdriver.
Problem: “It’s not doing anything” after assembly. Almost always a wiring or upload issue, not a broken robot. Solution: retrace the guidebook’s wiring diagram pin by pin before assuming a defective part — reviewers across every robot-car kit in this roundup report this as the most common (and most fixable) early hurdle.
Problem: The robot only ever does the demo project. Once the guidebook projects are done, momentum often stalls. Solution: push toward small modifications — changing the obstacle-avoidance distance threshold, or combining line-tracking with a buzzer alert — turning “finished the kit” into “started experimenting,” which is really where the learning compounds.
How to Choose an Arduino Starter Kit Kids
- Match the kit to your kid’s patience level, not their age alone. A patient seven-year-old can outlast an easily-frustrated eleven-year-old on a fiddly breadboard build.
- Decide if the goal is “learn electronics” or “build a robot.” These point to different kits — a general starter kit versus a dedicated robot car kit like the ELEGOO Smart Robot Car Kit V4.0.
- Check whether tutorials are PDF-only or video-based. Younger or less independent readers generally do better with video walkthroughs.
- Confirm the board is genuinely Arduino-compatible. Look for explicit mention of Arduino IDE compatibility rather than a proprietary app-only system, which limits future flexibility.
- Weigh sensor variety against focus. A wide sensor spread (like the ELEGOO UNO R3 Super Starter Kit) suits exploratory kids; a narrower, robot-focused set suits kids chasing one specific build.
- Budget for a second kit later, not one kit forever. Almost every family in this category ends up buying a second, more advanced kit within a year or two if the interest holds.
- Read aggregated review sentiment for assembly difficulty, not just star ratings — a 4.6-star kit with “assembly was frustrating” as the top complaint theme tells you more than the number alone.
Coding Robot Kit vs Traditional Arduino Starter Kit
| Factor | Coding Robot Kit | Traditional Starter Kit |
|---|---|---|
| Primary output | A driveable, moving robot | Static circuits and displays |
| Best For | Kids motivated by tangible results | Kids motivated by how things work |
| Assembly time | Longer, more mechanical | Shorter, mostly wiring |
| Sensor breadth | Narrower, movement-focused | Wider, general-purpose |
| Example | ACEBOTT Smart Robot Car Kit | ELEGOO UNO R3 Super Starter Kit |
The honest answer to “which is better” is that they teach genuinely different things. A coding robot kit compresses the reward loop — kids see movement and reaction almost immediately, which suits shorter attention spans — while a traditional starter kit builds a broader foundation in circuits, sensors, and displays that a robot kit’s narrower component set doesn’t cover. Families chasing long-term engagement often do best buying one of each over time, starting with whichever format matches the kid’s stated interest, rather than assuming one format is objectively superior.
AI Robot Kit Tweens: Hype vs Real Learning
“AI robot kit” has become a popular label in this category, and it’s worth being straightforward with tweens about what it actually means on Arduino-based hardware. None of the seven kits in this roundup — including the robot-car options — run true machine learning on-device. What they run is conditional logic: if the ultrasonic sensor reads less than 20 centimetres, turn the motors. That’s genuinely useful programming education, but it isn’t artificial intelligence in the way a tween might picture it from headlines about ChatGPT or self-driving cars.
Where the “AI” framing does hold up somewhat is in kits that pair Arduino hardware with companion apps offering more adaptive behaviour, or in the broader ecosystem of Raspberry Pi-based robot kits (a different, more powerful hardware platform some families graduate to later) that can run genuine on-device vision recognition. For Arduino-specific kits like the ones covered here, it’s more accurate — and more honest with your kid — to describe the robot-car projects as “programmable” rather than “AI-powered.”
That distinction matters pedagogically, too. Canadian STEM organizations like Let’s Talk Science have specifically flagged growing investment in AI and digital literacy programming for youth, and real AI literacy starts with understanding the difference between rule-based logic (what these kits teach) and actual machine learning (a later, more advanced topic). Teaching that distinction early arguably matters more than the marketing label on the box.

Microcontroller Learning, Programming Hardware & Electronics Integration
Microcontroller learning is really the umbrella skill underneath everything in this category. A microcontroller — the small chip at the heart of every kit here — is a tiny computer that reads inputs (sensor data) and controls outputs (LEDs, motors, displays) based on code. The learning curve typically follows a predictable arc: week one is usually confusing (new vocabulary, new software), weeks two through four click as patterns emerge, and by month two most kids are modifying example code rather than just running it unchanged — a meaningful shift from following instructions to genuine experimentation.
On the programming hardware side, every kit in this roundup uses the free Arduino IDE and a simplified dialect of C/C++ as the coding language. That’s a deliberate choice worth understanding: it’s a real, professionally-used programming language rather than a simplified kids-only syntax, which means skills genuinely transfer if a kid later moves into more general-purpose coding. Some families ease in with block-based tools first before touching text-based code — a reasonable on-ramp, though every kit reviewed here defaults to text-based coding from the start.
Electronics integration — actually wiring components together correctly — is where the most first-week frustration happens, and understanding the basics helps enormously. A breadboard’s rows are electrically connected in short strips; a resistor almost always needs to sit between a power source and an LED to prevent it from burning out; and a loose jumper wire is the single most common reason a “correctly coded” project doesn’t work. None of this requires an engineering background to teach — most kit guidebooks explain it clearly — but a parent skimming the first chapter before handing the kit over saves a lot of frustrated troubleshooting later.
Features That Actually Matter (And Those That Don’t)
Marketing copy in this category loves big numbers — “300+ components!”, “87 projects!” — and some of that genuinely matters, some doesn’t. Component count matters less than component variety and quality; a kit with 60 well-chosen parts (sensors, motors, displays) teaches more than one with 300 mostly-duplicate resistors and LEDs. Project count is similarly inflated in places — 87 projects sounds impressive, but most kids complete a fraction of any kit’s total library before moving on, so treat high project counts as “room to grow” rather than a promise they’ll finish them all.
What genuinely matters: whether tutorials are video or PDF-based (video wins for younger kids), whether the board is a real, current-generation chip (R4 boards outperform older R3 boards on more complex projects), and whether the kit includes a power supply and battery so a first project doesn’t stall on a missing part. What matters less: exact component counts, “premium” packaging claims, and AI/smart branding on kits running simple conditional logic, as covered above.
Common Mistakes When Buying an Arduino Starter Kit Kids
The single most common mistake is buying a kit rated for an age well above (or below) your kid’s actual patience and reading level — age ratings on the box are a rough guideline, not a guarantee of fit. A close second is assuming “starter kit” means “no computer needed”; every kit here requires installing free software on a Windows, Mac, or Linux computer, which some first-time buyers don’t realize until unboxing.
Buying based purely on star rating without reading the common-complaint themes is another frequent misstep — a 4.6-star kit can still have “confusing wiring diagrams” as its top recurring criticism, which matters enormously for a first-time buyer but barely shows up in the overall number. Finally, some parents buy the flashiest, most expensive kit as a first purchase, assuming more features means a better start; as covered in the SunFounder Elite Explorer Kit section above, a steeper kit as a first purchase is a common reason interest fizzles before it takes hold.
Safety, Regulations & Age Appropriateness in Canada
Electronic toys and educational kits sold in Canada fall under Health Canada’s Toys Regulations, part of the Canada Consumer Product Safety Act, which covers mechanical, electrical, thermal, and small-parts hazards for products marketed to children. In practice, that means legitimately sold kits — including everything in this roundup — must meet defined electrical safety limits (these kits run on low-voltage USB or 9V battery power, well below any shock hazard threshold) and clear age labelling.
That said, a few practical safety habits go beyond what regulation covers. Small components — resistors, jumper wire ends, tiny screws in robot-car chassis kits — present a choking hazard for households with younger siblings, so direct adult supervision matters more for the 7–9 age bracket than the label alone suggests. It’s also worth noting that soldering is not required for any kit in this roundup; if a future kit purchase does involve soldering irons, that’s a meaningfully different supervision requirement (burn risk) worth flagging separately. CSA-certified power adapters, where a kit includes one, are a reasonable extra checkpoint when comparing similar-looking bundles.
FAQ
❓ Is an Arduino starter kit good for a beginner kid with no coding experience?
❓ What age is appropriate for an Arduino starter kit kids product?
❓ Do Arduino kits for kids require a computer?
❓ Is a coding robot kit better than a regular Arduino starter kit for a first purchase?
❓ Are AI robot kits for kids actually using artificial intelligence?
Conclusion
There’s no single “best” arduino starter kit kids product on this list — there’s a best match for your specific kid, budget, and goal. A cautious young beginner does best with the plug-and-play simplicity of the Seeed Studio Grove Beginner Kit; a budget-conscious family testing the waters gets the most sensor variety per dollar from the ELEGOO UNO R3 Super Starter Kit; and a tween chasing an actual driveable robot should look straight at the ELEGOO Smart Robot Car Kit V4.0 or ACEBOTT Smart Robot Car Kit rather than a general electronics bundle.
What ties every strong outcome together, based on the aggregated review patterns across all seven kits, isn’t the specific board or component count — it’s realistic expectations going in. A kit that matches your kid’s actual patience level, paired with a parent willing to sit through the first fumbling week of wiring mistakes, tends to outperform whichever kit simply has the biggest box. Whichever pick you land on, the underlying skills — reading a diagram, debugging a circuit that won’t light up, writing code that actually does something in the physical world — carry well beyond whatever kit teaches them first.
Recommended for You
- 7 Best Robotics Kits for 10 Year Old Kids in 2026
- Best Pokemon Cards Storage & Protection: 7 Top Picks (2026)
- 7 Best Marble Run Construction Kits for Canadian Families (2026)
Disclaimer: This article contains affiliate links. As an Amazon Associate, I earn from qualifying purchases. If you purchase products through these links, we may earn a small commission at no additional cost to you.
✨ Found this helpful? Share it with your friends! 💬🤗
